Tuesday, 4 March 2014

Fox 36 Float Fork Lowering Guide

,
Hello again,


After riding my Mega in it's 130/160 configuration since I built it up (240 miles ago). I came to realise that the big 160mm fork was having a negative effect on the bike's handling. Even though the frame is recommended to use a fork between 140mm and 160mm, I didn't feel like the bike was quite balanced properly. Having the bars nice and low is something that I'm comfortable with and suits my riding style but with the fox 36 fork on my mega set at 160, having a low bar was just not possible. Even with just one small spacer between the headset and stem.

Running this much travel at the front also had an effect on other things. I found it difficult to rail certain corners because of the raised bottom bracket. Another result of the amount of travel is that the head angle was very slack, and so was the seat tube. This made it hard to keep the front wheel down while climbing.

After doing a bit of research into my forks, I found out that I could lower them with additional spacers. This was the ideal solution! I just had to decide how much to reduce them by.

The axle to crown length of a 150mm RockShox Revelation (spec'd on a standard 2013 Mega TR) is 529mm. The axle to crown length on my Fox Float 36 is 545mm at 160mm travel. So at 150mm it would be 535mm, and at 140mm, it would be 525mm. It would have been perfect to have a 15mm spacer but unfortunately I could not find one. This would have meant the axle to crown would be 530mm, pretty much the same as a revelation.

After some thought I decided to go to 140mm. I didn't think I would be able to feel much of a difference if I only dropped them to 150mm. Another reason was that I used to run a pair of 140mm Fox Van 32 R's on my reign and I never had a problem with running out of travel. I just needed something stiffer.

Anyway, I managed to find a few vague tutorials showing how to lower forks but I didn't feel any were particularly helpful. So I decided to write one myself.

What you will need:
  • 32mm machined flat socket - I bought mine from eBay but you can pick them up from Mojo here.
  • Hex keys - to remove the fork from the bike and the brake calliper from the fork.
  • 10mm wrench - To remove the bottom foot nut.
  • Long thin thing - I used a screwdriver bit to prod out the shaft assembly.
  • Rubber mallet - I used a hammer and a rag as I'm a poor student and can't afford fancy tools.
  • Shock pump - to re-pressurise the fork once you're done.
  • Measuring jug - to measure 30ml of oil.
  • At least 30ml of 10wt suspension fluid - to lubricate the fork lowers.
  • At least 5ml of Fox Float fluid - To lubricate the air chamber.
  • Stendec suspension grease - To lubricate the negative spring and shaft assembly.
  • Oil pan (or washing up bowl) - To catch the old fluid.
  • Fox Forx travel spacer - Not pictured as I forgot to take this picture before I started.

Parts needed

Step 1:

Remove the fork from your bike, make sure it's clean and de-pressurise it by pressing the schrader valve under the blue cap.

One de-pressurised 36 fork ready to be lowered.
 
Step 2:

Use your 10mm wrench to remove the foot nut and crush washer on the bottom of the calliper side of your fork and store them in a safe place. Keep the fork upside down to avoid fluid leaking out at this point.

Nut removal

Step 3:

Using a rubber mallet, firmly knock the protruding bolt till it dislodges and falls further into the lowers. Now turn the fork the right way up to allow the fluid to drain into the oil pan.

Out with the old fluid


Step 4:

Once all the fluid has drained away in step 3, use your 32mm socket to remove the air side top cap assembly. Make sure your tool has enough purchase on the top cap as it is only made of aluminium and can be easy to bite into. Once you get the top cap assembly off, store it in a safe place. Then turn the fork upside down to empty the fluid seen below.

Unscrewing the top cap assembly
More old fluid


Step 5:

Use a long thin rod (I used a screwdriver bit) to prod out the shaft assembly. This can be a little stiff.

Pushing out the shaft assembly
 
Step 6:

The shaft assembly should look like the picture below. To install the travel spacer(s), slide the negative coil spring to the left if you are holding it with the threaded end in your left hand. Then clip the travel spacer(s) in the space you have just created between the spring and the bumper.

Once you have added the travel spacer(s), use Stendec suspension grease to generously lubricate this whole unit. Next, insert it back into the top of the fork, thread side first. Make sure it goes most of the way in, but not far enough that the bolt pokes back out through the bottom of the lowers.

Before the spacer
After the spacer


Step 7:

Measure 30ml of 10wt suspension fluid and pour it into the lowers of your fork. Next, compress the fork so that the threaded end of the shaft assembly pokes out of the lowers then re-attach the crush washer and nut and torque to 50 in-lb.


Adding the new fluid
tightening the crush washer and nut.

Step 8:

Turn the fork the right way up. Add a the contents of one 5ml Fox Float pillow packet to the air chamber, but leave a little left over to lubricate the threads on the top cap assembly.

TOP TIP: You can add slightly more Float Fluid to the air chamber if you want your fork to ramp up more through it's travel!


Adding float fluid to the air chamber.

Step 9:

Lubricate the top cap assembly threads with the remaining Fox Float fluid. Screw the assembly back into the top of the fork and torque to 220 in-lb. Now use the shock pump to re-pressurise your fork. That's it, you're done!

Tightening the top cap
Finished!
Ready to rip!


Looking more balanced now


I hope some folk out there found this useful. Feel free to leave a comment! I will be happy to receive any feedback. I shall report back soon to give you an update on how the bike rides now and any improvements.

Happy Riding!

Tuesday, 18 February 2014

Video: Winter in Wales

,
On one Friday morning we felt it had been too long since we were out on the bikes. The weather had been grim that week and was still grim on the Friday but we had to get out. After a while of sitting indoors I get fidgety and need my fix of trails.

Dan and I chose to go and film on a track which we had discovered just weeks before. Unfortunately Dan's bike was in the local bike shop having a new shock bushing fitted meaning that he would be fixed behind the camera rather than occasionally in front of it. This was OK though as he wanted to test his new Canon EOS 70D which he had bought over Christmas.

The weather was horrendous when we arrived in the car park, so bad that we considered heading somewhere else on lower ground. The car was blowing around while we were in it taking cover from the rain. After 15 mins we got a break in the rain and quickly put the bike together and scrambled to the forest for cover.

The track was fairly wet and slippery but with grippy rock underneath in some parts. This made it difficult to judge when the wheels were going to slide. Some people have criticised the video because there's not enough mud in it to justify it being winter! It's not a sloppy track because of the rock underneath I think. It was wet though! Anyway, you can judge for yourselves.

It took me a few goes at some of the corners to make it look fast and aggressive and after a couple of hours we had all the footage we needed. I am pretty happy with the final result!

Feel free to leave feedback in the comments!

Saturday, 1 February 2014

Mega Photos!

,
I forgot to share these with you guys! When I arrived back at uni after Christmas with a clean bike I thought it would be a good idea to try and get some good photos. My friend Dan had just got a new camera which he wanted to test out so...


Here's the results:


And here's one I added a HDR effect to with Photomatix.

Flats vs Clips

,
This has been a choice which splits riders since the beginning of time. I've always been a flats man till now. Since I started riding properly in around 2007 I've used flat pedals and have never had any problems with them in general. They suited what I ride which is a great variety of stuff! When people ask what I ride I usually just say 'trails'. Under that umbrella comes downhill, freeride, trials (not trails), all mountain, enduro cross country... I could probably name more. My point is that the flat pedal allows you to ride all of this. Ok, so maybe you don't have the security of your foot being clamped to the pedal through a rooty downhill section like you would on clipless pedals and shoes. Or not having consistent power for those steep loose climbs, but I felt like flats were a good compromise at the time. I'd grown up on them and gained confidence, so why change?

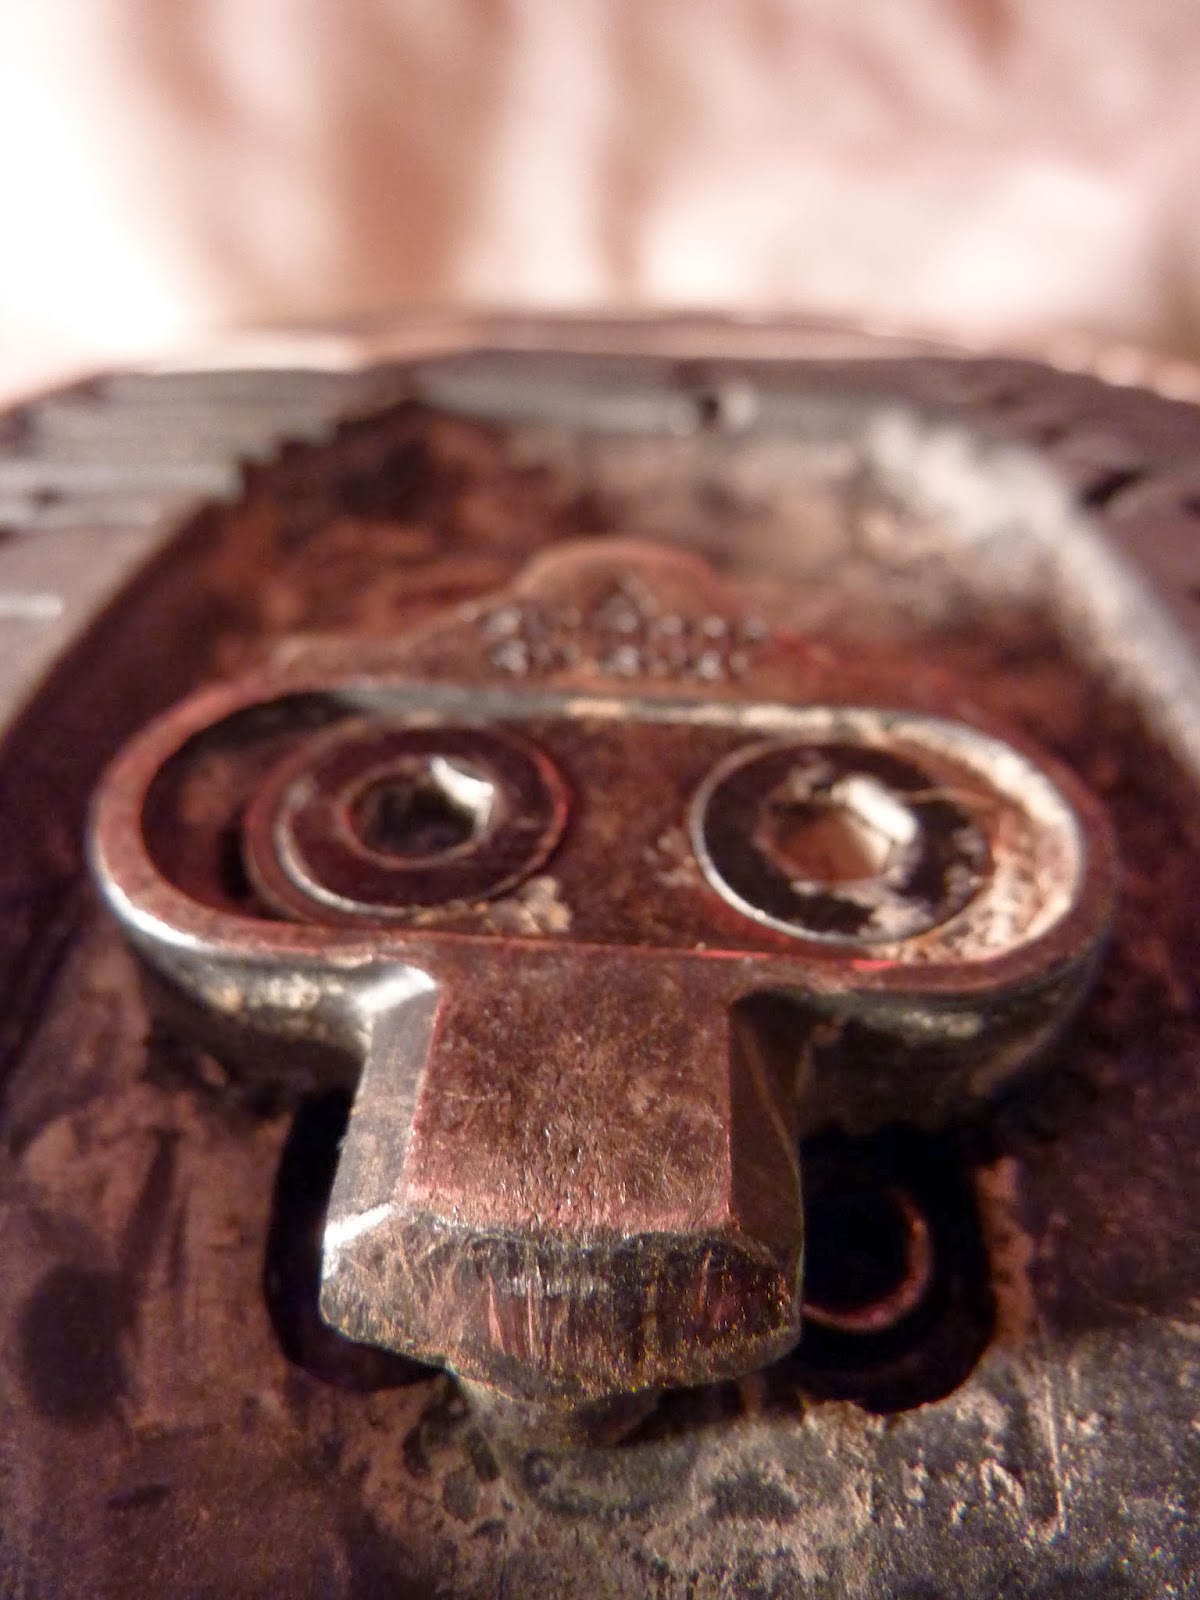
Cleat


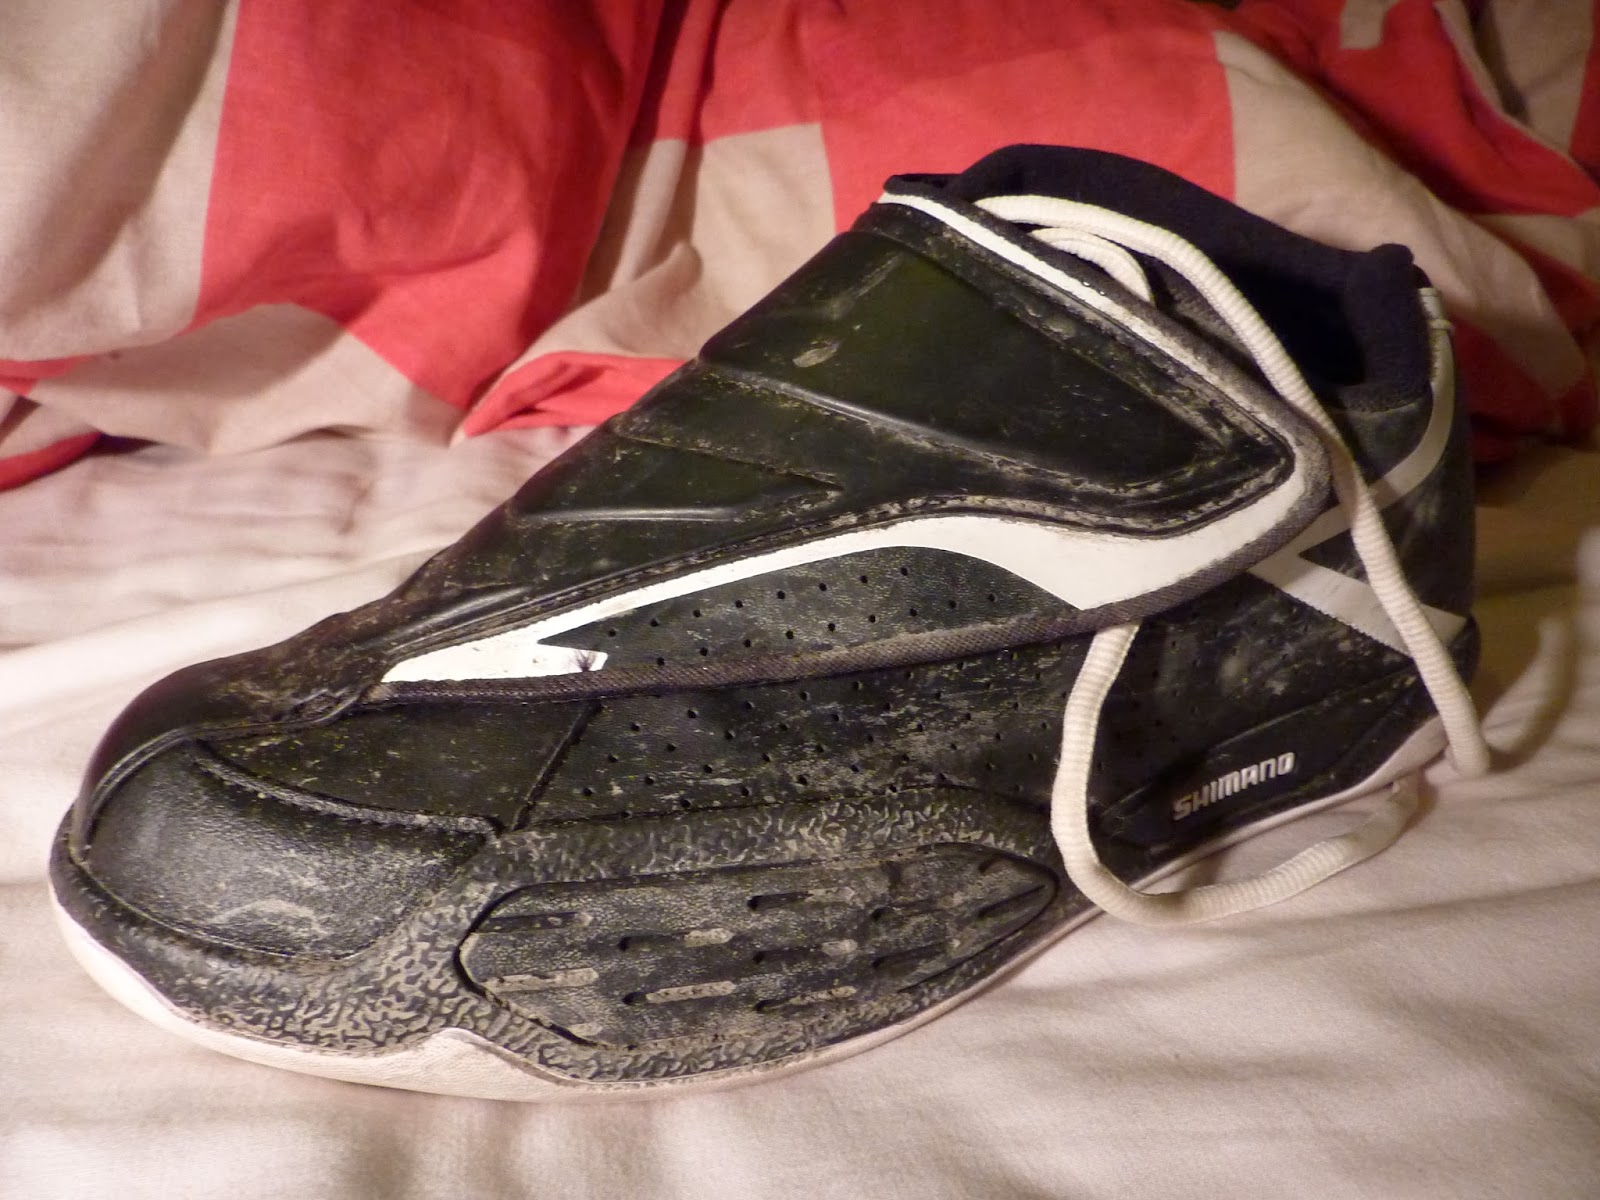
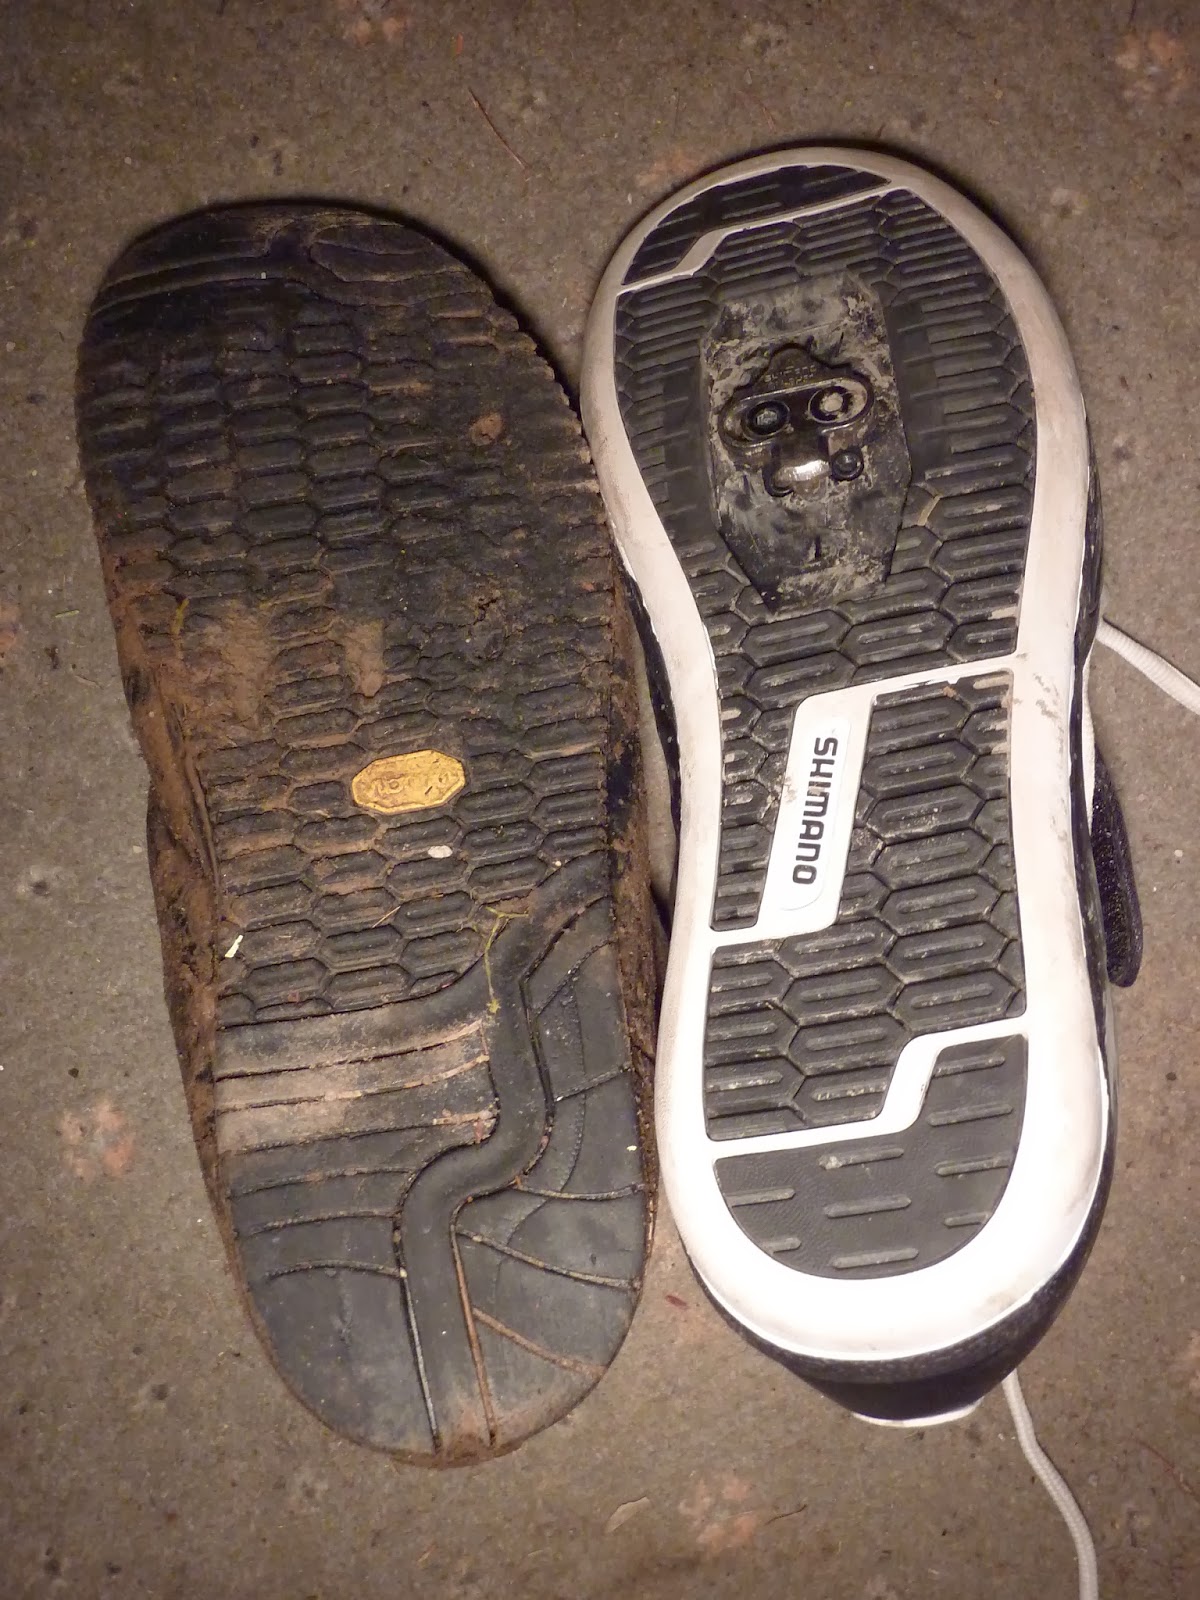
The simple answer is that I wanted to experience clipless shoes and pedals properly to see if they could offer me any advantages. Some people would say "don't fix it if it ain't broke" which is a good point but what if it could be better? I opted for a pair of Shimano M647 DXs as I wanted something durable with a big platform. This is exactly what you get with the DXs but at the expense of weight. For shoes I went for the Shimano AM-45s as I have used Shimano's flat pedal equivalent AM40s and AM41s for ages and have had good experiences with them. Lots of people use this combination and rate it highly.

AM45s

Old and New


Unfortunately due to the bad weather and workload at uni, I've not been able to test them out on proper trails. However, I have managed to squeeze in a few street rides where I have also ridden up and down Constitution Hill here in Aberystwyth. I managed to get my PB climbing up Consti on a windy and rainy night. So climbing, tick. Clipless definitely makes a massive difference in that department. On the descent I was a little hesitant to give it full beans just in case I had to dab. I was practicing getting my foot in and out on the switchbacks so that clipping and unclipping would become a natural reaction. I was definitely more hesitant than usual on the descent but I am going to be persistent with till I am as confident with them as I am with flats.

Shimano DX


At this point there is not much more to say. I shall report back once I have done a bit more riding on them!

Introducing the new Theme / Layout!

,
So dudes, after sticking with the same theme for a long time I decided it was time for a change. I think it's easier to read now and a bit neater. I've added a Strava widget to the left of the page so you guys can see when and where I've been riding. Hopefully navigation is easier too.

It's been a bit of an ongoing project alongside my uni projects and exams so I've been messing with CSS and Javascript rather allot lately! This is partly the reason why I've not been getting out on my bike as much as I'd like to. This will all change soon when my new modules start and I don't have much work on!

Feel free to give me feedback, be it positive or negative!

Cheers

Tuesday, 28 January 2014

Forest of Dean Mini DH 26/01/14

,
Hey guys,

I've had a little bit of time to test the bike now and I'm really getting on with it! Over the weekend I raced a Mini DH at the Forest of Dean with the AberMTB crew. Having never been there before, I wasn't really sure what to expect. The track which was used was Sheepskull which was apparently one of the more pedally tracks there. This turned out to be a little bit of an advantage on some sections of the track although overall, the track was still more suited to a 180mm - 200mm downhill bike.


Practicing on Saturday was a good day of riding. It was very hard to learn a full track in a day and half which meant some of my racing lines were questionable to say the least. My main problem was the roots section towards the top of the track. There was a few different ways to go with the high line up and over some slightly off camber roots being much faster. I found this section the most difficult part of the track because I just couldn't seem to remember any markers which would aid me to point myself at the right line.


My mega was pretty faultless over the whole weekend which I was really pleased about. I had put some dual ply Maxxis Minion DHFs on in preparation for the weekend and it was the right choice. The track was really wet but not greasy so luckily I wasn't jealous of all the folk on spikes. Other than changing tyres, tyre pressures and fork/shock pressures, my bike was setup the same as how I ride it everywhere else. I ran the fork a little softer than usual to help cope with the ruts and braking bumps.


So by now you're probably wondering how I did in the rankings? Well, I shall tell you. My first run earned me a 1.43.89 which I was fairly happy with. It was consistent with a good pace all the way and no mistakes. I remember considering not doing a second run when the weather turned worse but after a long wait I pushed back up the hill to do another run. The track was in a similar condition to how it was on the first run. Very wet, but with a surprising amount of grip. On the second run I was a bit more aggressive and on some sections it payed of but I made some minor mistakes which gave me a time of 1.44.70. My placing was 46th out of 93. Overall I was 101st out of 296. Although I was not completely happy with my result, I understand that the Mega TR is a 130mm bike made for trail and all mountain riding. Taking this into account I think I can be happy with my result.


I really enjoyed the event but I'm not too sure whether I'll enter another. I want to concentrate more on Gravity Enduro as it is more suited to my bike and it doesn't involve as much standing around which is something that niggled me at this Mini DH event. Cheers to the event organisers for putting on a good show and the AberMTB crew for helping with lifts, accommodation a food!

Saturday, 28 December 2013

New Bike! Nukeproof Mega TR 2013

,
Back again!


After monitoring eBay, Singletrack Classifieds and Dirt Classifieds for just too long, I finally found a new frame which I was happy with to replace the Reign. The decision to start saving and looking for something new came when I tried a variety of bikes at a demo day at Stainburn, Yorkshire which was put on by Stif Cycles. Before I rode any of the sparkly bikes (which were way out of my price range) I was relatively happy with my Reign. I thought, apart from many scratches and scuffs, it was still a great bike!

The first bike I swung a leg over was an Orange Five Pro. My dream bike. It rode very well. The geometry was spot on for me. It felt like I was in the bike rather than on it. This gives you much more confidence when railing corners because you don't feel like you're having to put effort into staying on the bike! I also like the fact that it has a little bit of lateral flex which helped me grip in corners. I'm not a heavy rider so this didn't become a problem but I can imagine if you've had a few too many pork pies your not going to get on with the flex. I could really feel the 650b wheels when it came to the rocky bits they sail over things much more easily. Some people say by using bigger wheels you are just dumbing down the trails for yourself. This is sort of true but you just need to ride and build gnarlier trails!

The second bike I rode was a Santa Cruz Blur TR which is a short-ish travel 26" trail bike. This was probably the most fun bike I rode that day. It was maybe not as fast as some of the other bikes over jagged rocks but in corners it was very flickable. On the demo day I scored a Strava KOM on one of the popular segments (500 people on the leader board) and I think it was on the Blur TR. I tried a frame size: Medium but I think I think I'd need a Large if I was to buy one.

I also rode a Santa Cruz Bronson and 5010 (Solo). The Bronson was alloy and felt very stiff. To me it felt like a pure enduro race bike. It wasn't as fun as the Blur but it was very fast. Cornering on loam was difficult because it was so stiff that you couldn't tell how much grip you had left. Maybe this was just something to get used to. The 5010 felt like a cross between a Blur TR and a Bronson. It was a little longer in the top tube than the Blur and as a result didn't feel quite as nimble but it was still a very flickable bike.

My conclusion was that the shorter travel bikes were more the sort of thing I was looking for. They seem to be able to handle rocky stuff almost as well as a 150/160 bike you just have to hold on tighter. It's the cornering that makes me really love shorter travel bikes. They just seem to control their travel much nicer and don't wallow in corners meaning you can really rip out of them!

When a 2013 Nukeproof Mega TR came up on the Dirt Classifieds within budget I went for it! I knew I could take the majority of the parts from my Reign and bolt them straight on. I only needed a new headset, wheel adaptors and a seatpost shim. I've only ridden her twice and on the first ride she shed her mech and a few spokes out of the wheel :( Luckily I had an old wheel with the same length spokes so I used them to build the wheel back up. I also bought a new Shimano XT Shadow + rear mech from the great folk at Westbrook Cycles. The second ride was ace! It was very windy and muddy, a few trees had come down that night which prevented me from going full pelt but it was great fun. The main issues I had with the reign are no more. The seat tube angle was too slack which made climbing difficult, the head tube angle was too slack which made it difficult in tight turns, but worst of all, the bottom bracket was too high! This made cornering and balancing on slow trialsy stuff very hard.

The mega has fixed all of this, I just need to be more careful not to bash my cranks/pedals on trail features now. I shall report back when I get some more riding on the bike done.

Here are some pics of her!


Cheers!

Any questions about the build or how it rides, please ask!

Sunday, 23 December 2012

1 x 10 is the Future of All Mountain (Bike Update)

,
Hi Guys,

Doing these long 25 mile rides around Aberystwyth has really taken it's tole on my drivetrain. The chain had snapped as I rode to the meeting point for an AberMTB Llandegla trip and the jockey wheels had worn out from the countless times I had ridden Nant Yr Arian in gritty conditions.

Coming up to Christmas I had saved £400, mainly from not going on as many nights on the town as the average student. Initially, I was going to order new wheels while at Aberystwyth but I was then convinced to wait until I got home. I wasn't too sure about spending allot of money on a new pair of wheels and then having them delivered to student accommodation.

A few days before I left Aberystwyth I order a pair of Superstar Switch Stealth hubs laced to Stans Flow rims in black. Superstar have them on offer for £200 which left me £200 for the drivetrain. my initial thoughts of the wheels were amazing. The rear saved 225grams over my old Formula/Alexrim DP20 wheel! The engagement seems to be faster which will be great for getting the odd crank in after a berm on twisty trails.

Along with the wheels I ordered a Superstar Plasma ISCG Old chain device as my plan is to run a 36T single ring at the front with an 11-36T cassette out back. I wanted to order the chain device before any of the other gear because I knew how hard it would be to fit to the Reign. The suspension linkage layout makes it very awkward. I didn't want to take the plunge and buy everything in case I couldn't get it to fit.

After fiddling around with it for a long time I finally got it lined up in a way that I was happy with. Fitting this involved cutting down the bolts which hold the back plate onto the adapter, I also had to file down the adapter plate quite a bit to stop it contacting the bottom pivot. If anyone wants any close up pictures of the setup, please just ask.

When ordering the rest of the gearing I went for an SLX cassette in the 11-36 flavour to keep the weight down and to give me reasonable climbing abilities and a Zee freeride derailleur because I wanted one with a clutch mechanism. It was about the same price as an SLX Plus mech but I thought the Zee would be a little more durable. I bought a Hope 36T single ring and some Brand-X narrow chain ring bolts to mount to my existing cranks. I went for a cheap KMC X10-93 chain and an SLX shifter. I went for the SLX shifter over a Deore unit simply because I like to remove the shifter windows. The less clutter on the bars, the better. After skimping on outer cables in the past (and my gear system suffering as a result) I chose a two meter length of Goodridge outer gear cable. A friend at uni runs a full outer cable and he doesn't seem to have any problems and so I thought it would be perfect for the grim conditions back home.

Mounting all this to the bike was surprisingly quick and simple. My test ride would involve a quick six mile loop over Little Roseberry and round the side of Roseberry Topping. I chose this route as the descent down Little Roseberry is rocky and fast; the ideal test of the new Zee Plus derailleur and chain device combination.

Climbing up the rock garden on the way to Little Roseberry was only slightly more energy sapping than usual but this was to be expected. The descent down Little Roseberry steps was incredibly silent. All I could hear was the tyres bouncing over the rocks and the suspension sucking up the bigger hits. It was so confidence inspiring knowing that the chain wasn't going to come off or slip into the granny ring when I went to throw a crank in. The ride round around the side of Roseberry Topping was pretty calm. The adverse weather that has fallen here over the past couple of weeks hasn't seemed to have had much of an effect on the top section of the woods below the Topping.

When I got home it turned out I had stolen the KOM for 'Little Roseberry Steps' back from one of my friends who had taken if from me while I was away. I had not given the drive train an easy first ride then. I also noticed one of the spokes on my rear wheel was very loose, I knew about Superstar wheels being a bit iffy in the build department but after five minutes with a spoke key they are fine.

Here's some pictures and a video from the AberMTB Llandegla trip....


AberMTB Llandegla Trip from Jack Reeve on Vimeo.

Ride safe :)

Tuesday, 30 October 2012

A New Riding Location

,
Hello Again,

Now that I am going to be spending most of my time in Aberystywth I need to go and explore in order to find new riding. There are three main locations which the bike club regularly use. Clarach is the nearest, it's a small forest which has lots of downhill trails and a few tamer cross country style ones. I can get away with riding most of this on my Giant Reign.

Capel Dewi has another forest which is a little bigger than Clarach although it is less developed. It has one or two full trails with one including a pretty big road gap which I am determined to do one day. There are many trails which are still being built but they look like they will turn out sick when they are finished.

Nant Yr Arian is the nearest trail centre which caters for XC. It's not very well known considering it has a few good red routes. It's about a 10 mile ride there but it's all quiet roads so you can just chill out. There's also a few natural trails on the outskirts such as White Fridge or Secrets. It's not like other trail centres in that the trail surface feels natural, it's rocky rather than this gravelly stuff which they are using to dumb down other trail centres. Don't get me wrong, the trails are not technically demanding it's just that the surface is a little closer to how things would be on a natural trail.

On Saturday while my friends back home were inside watching the snow and rain fall, I was out filming on the Mark of Zorro section of trail at Nant Yr Arian. Enjoy and ride safe!


Nant Yr Arian - Mark of Zorro from Jack Reeve on Vimeo

Monday, 29 October 2012

Holiday in Fort William

,
Back again,

I can't believe I forgot to do a post on this! This year was no different to any other year. We would leave it until the last minute to book a holiday. This is mainly because my parents can never agree where to go. My mum always wants to go to a hotel in a warm country to relax and take in the culture whereas my dad would rather go somewhere cold (he burns in the sun) where he can sit by the side of a lake and fish. He also doesn't like having to travel on planes to go on holiday. He usually gets his own way. This year I jokingly suggested that we go to Fort William after a biking trip there with some friends was cancelled. My dad took this seriously and found a nice log cabin about a mile away from the Nevis Range.

So this was a dream come true for me. I had access to the gondola assisted red route and world famous downhill track as well as Ben Nevis and many other natural trails. A week later my dad had persuaded my mum and had booked the place.

A few weeks before we were due to set of, I had saved up enough money for a GoPro HD Hero2 and Chest Mount which would allow me to film my riding. As I had just passed my driving test my mum thought it would be a good idea for me to do some of the driving to Fort William and while we were on holiday. This would be the first time I had driven with a bike rack, we use one which overhangs off the boot but we decided to take the wheels off just to be on the safe side. As I had only just passed and the the roads can be pretty narrow in the highlands I was glad we had taken that precaution.

On the first couple of days there, I decided to do a few evening rides just to try and find some natural trails. I didn't find much but then again I didn't venture too far because I didn't want to get lost on my own! On one of these evening rides I did manage to find a few natural trails though which were very steep and loose but so much fun.

My first visit to the Nevis Range was with my dad and brother to ride the 10 Under The Ben trail which I was fairly disappointing with. There was lots of fire road climbing with not much of a reward. In one particular instance we climbed for quite a while only to descend on a dead straight piece of single track with no features. Considering this route was graded as a red, it could have been a bit more technically demanding.

The next time we visited we rode the Witch's XC trail which was also graded as a red. This had much more fun single track and was a pretty fun loop. It was not very physically demanding but I would have been more than happy to do a couple of laps of it to fully appreciate the sections of single track.

A friend had planned to be in Fort William at the same time as me as he was heading to the Isle of Mull for a holiday. He took a slight detour and stayed in a bed and breakfast for a few days in order for us to get some quality riding in. We had planned to ride Ben Nevis on of the days but due to bad  weather we changed our plans and ended up going round the Witch's trail again. It was quite amazing to see what a difference trail conditions make to your speed. On the day where I rode with my dad and brother it was bone dry. I was using a 2.35 High Roller 60a on the rear and a 2.35 Minion 60a on the front and my wheels were just washing out all the time. It felt as though I couldn't maintain any speed due to loosing grip. When I rode the trail with a friend the day after it was slightly damp, not soaking with lots of puddles but just enough to make the trail surface 'stick' a little better. I was using the same tyre combination with the same pressures and it just felt like I could hammer the bike into corners with confidence. This allowed me to maintain much more speed on twisty sections. You could say that it was because the second time I knew what was coming up but it genuinely felt as though my tyres were sticking much better.

The day after, me, my dad and a friend set off to ride Ben Nevis. My dad was walking with us mainly to keep my mum happy but also for the self achievement. We rode up the main bridleway which was pretty rocky early on then seemed to flatten out in the middle section before becoming much more rough and jagged near the top. I would say we rode about 40% of the way up and pushed the other 60%. My dad got to the top about half an hour before me and my friend mainly due to how awkward the terrain was for carrying bikes. When we got to the top we got the obligatory bike above head photo's and had lunch.

Bit foggy, I'm the one on the right!
Unfortunately I've been extremely lazy and haven't processed the footage I got from the GoPro yet but what I can say is that the descent was amazing. there was a bit of everything really from fast smooth bridleway to rocky steps to loose jagged scree. It was good fun stopping at the really difficult sections and having several goes at getting down them trialsy style. Some of the walkers were not too pleased with us due to the fact that we would overtake them, then get a snake bite or a mechanical, then they would walk past us, then we would overtake again. That went on most of the way down the mountain but we couldn't help it! On the top section I decided to pin it and see just how fast and loose things would get. Bad idea. Turns out my derailleur got pretty loose and managed to tuck itself nicely into the spokes to that was our first mechanical. I managed to bend it back using brute force. I decided to keep it far into the cassette for the rest of the descent.


The rest of the mechanicals were all snake bites from hammering our wheels over the rocks. I think we racked up about six flats between us, but it was well worth it for such a sick ride.

The next day we got a gondola day pass and did several runs down the Downhill Track and gondola accessed red route. I first followed my friend down the red as he had ridden it before. The wooden northshore on the top half of the trail was so grippy. I couldn't help thinking even with the chicken wire it would be a different story in the wet. That thought of what could happen if you run wide remains in the back of your mind when riding northshore like that. I had a couple of brown pant moments where I would jump and land awkwardly or shoot offline coming out of a banked corner but overall you can carry lots of speed if you are precise with your cornering.

The next last half was fairly rocky. It almost felt like a mountain bridleway rather than a purpose build bike trail but I like that. the thing which gave it away was the fact that there was reliable drainage to keep the water away.

Here is a GoPro video of the red run, sorry the quality is a little poor. I had to compress the file to allow it to upload.


Nevis Range Red Trail from Jack Reeve on Vimeo


Next I rode the downhill track. It took a little bit of persuasion to get my friend to ride it. In the end I said "You won't get this opportunity very often and you'll regret not riding it in the future." He did one run and I was happy for him that he had given it a go.

The track start off being quite smooth with a few gravelly turn before it turns into full on carnage in the middle section, you are hammering through rock gardens leading into gravelly berms. Your hands are already pummeled by this point (mine were anyway). You don't get to experience the full track which world cup riders smash, instead you miss out the road gap and hit a rocky track which takes you down to the start of the motorway section. This has some double decker sized tabletops which take allot of speed to clear. I was getting about 3/4 of the way along them at best. You are pedaling flat out along this section before you are shot down a few steep section and into the finish area. By this point you can barely release your hands from the bars due to the arm pump.

Here is another GoPro video, enjoy!:


Fort William DH Track from Jack Reeve on Vimeo


We got five runs each on that day. I rode the Red three times whereas my friend rode it four times. I rode the downhill track twice and my friend rode it once. At the end of the runs my suspension was pissing oil. On one run it had dribbled down the fork leg and got dangerously close to the disc rotor. Both of these tracks take it out of you and your bike but they are well worth doing. Plus you get 15 minutes in the gondola after each run to rest your broken hands before sending it down the mountain again. Bonus!

My dad, brother and I also rode a Kinlochleven ride which we dug out from MBR. It had won some award for the best natural trail so it sounded very promising. My dad enjoyed that day even though the sun was scorching and the midges were helping themselves to our flesh. My brother, not so. He's more used to riding well maintained flowy bits of single track so he ended up pushing lots of sections. I was surprised how well my dad coped on that ride. He had bought himself a Giant Anthem X5 just before booking the holiday. before that he didn't ride off road very often. He had a 90's Specialized Hardrock which he used for commuting. The ride took the format of a long rocky fire road climb up to a dam before descending very varied single track all the way back. I think it deserved that MBR award.

See the rider on the left of the photo?

Cadair Idris

,
Hi All,

After going through the laborious process of attending university open days, writing a personal statement and applying to universities, I find myself in student accommodation at Aberystwyth University. I am studying Internet Computing with Systems Administration. The reason why I chose Aberystwyth was because it seemed to have a friendly atmosphere and it isn't in a big city. I don't think I could live in that type of environment. The Computing department seems up to date and well facilitated. The less important factor (at least, that's what my parents think) was the landscape and ultimately, would it cater for my style of riding? That is why I chose Aberystwyth.

The AberMTB Mountain Biking Club are great. They seem to follow a very chilled out approach to organising rides which suits me. On my third weekend at uni, a suggested ride was posted. The plan was to catch the train from Aberystwyth to Machynlleth then ride up Cadair Idris. I was up for this. I love these big mountain rides even if they do involve a bit of pushing.

We set out early on a chilly Sunday morning. I started the day as usual, hopped out of bed and into the shower, sat down at the table and tucked into my supermarket own brand fruit and fibre (I am a student). The ride down Penglais hill made things even colder. I freewheeled almost all the way from my flat to the train station where I would meet two fellow riders.

At the other end in Machynlleth I knew we had lots of road riding to do. It was not so bad for the other riders who were pedaling hardtails, but it was a different story for me on my Reign. The roads were fairly hilly which made things worse. We eventually got to the bridleway which we were going to take which marked the end of riding on tarmac. I was pleased by this. Early on, while riding up the shale double track I suffered a pretty horrific puncture. A dagger shaped piece of shale had pierced my worn out High Roller. I wasn't surprised really. The tyre had pretty much reached the end of it's life.

Dagger shaped shale
The rest of the climb up was fairly steady and rideable with no real technical terrain apart from the last section to the top which had some loose scree and rock gardens. There was also a very technical line near the top which I wasn't to sure about riding.

At the summit!
On the way down I had a few goes at the technical section as described above. On the first couple of goes I couldn't keep balance in the tight groove and so my front wheel kept on slipping but on the third go I nailed it and felt proud. I led the way down the rest of the top section, drifting on the scree and getting loose across the rock gardens.

I have to be honest, having ridden Snowdon and Helvellyn, this wasn't as much of a fun descent. The top section was fun and very challenging but the rest just felt like we were loosing all of our altitude on double track which is not the kind of riding I find fun. The thing is, sometimes it's not all about the ridding. It can be about the self achievement of riding a mountain like that. And even though the majority of the descent was double track, it was still worth the ride up to have a stab at that technical top section.

Saturday, 14 July 2012

Well Oiled Machine..... Not Quite

,
Hey Folks,

 I've finally got my Giant back together after replacing the frame bearings. Getting the bearings in was fairly difficult and lots of patience was needed. I was using the old bearings to press the new ones in using some threaded rod and washers. The aspect which made this difficult was lining up the bearing. As soon as you start to apply pressure, the bearings wedges into the frame at a slant which means you have to constantly back off and re-seat the bearing.

After a while I got all the bearings back in and the frame back together. Put the rear derailleur back on. Bolt the brake caliper on. add the chain and crankset. Job Done, Or so I thought. As I took the the bike out for a quick driveway test, the knocking noise which I was wanting to cure by replacing these bearings was still there! GRRRRRR. It seems to occur within the first few millimetres of travel.

The next thing to check is the shock bushings and mount hardware. If that doesn't uncover anything I will be truly clueless. Anyway, here's a nice picture of her right before I treated her to some sick drops and sweet singletrack.

Ride Safe :)

Before she was treated to singletrack

Monday, 9 July 2012

Giant Reign Update and a Couple of New Videos

,
How's it going,

After doing lots of riding in these very poor riding conditions my Reign has developed a knocking noise which seems to be coming from the frame pivots / shock bushings. It suddenly hit me that this is now a 7 year old bike and I've never replaced the frame bearings in the time I've owned it. Who knows whether the previous owner did.

Through lots of searching on Google I finally found confirmation of the bearing codes. I didn't want to totally dismantle the bike to get these numbers, only to find that a good set of bearings would cost extortionate amounts of money. I eventually found an eBay Shop selling good quality bearing kits for a range of bikes including the 05' Reign.

Now comes the tricky part. I've always dreaded fiddling with bearings due to their delicate form and that thought in the back of my head saying 'if you do this wrong you could potentially ruin the frame'..... and that would be bad.

What have I got myself into!?!?!

After removing the rear triangle and the lower and upper linkages I set to work making a little jig out of some threaded rod, nuts, washers and some old headset spacers. Strangely the headset spacers were key in this process. They were just the right size so that the bearing would fit through the spacer but the spacer would have good contact with the linkage / rear triangle.

After a couple of hours of gently easing them out I was finished. This was not as difficult as I first though. The main thing for me was just to restrain from just using brute force and take my time. Now all I have to do is wait for the new bearings to come in the post and pop them in. I'm so glad I found the eBay seller due to bearing companies wanting about £12 per bearings and I need 6 of them. The eBay seller is retailing sets for £27.99 meaning I will be able to put more money away to go towards a new Go Pro HD Hero 2 which will allow me to shoot some sweet footage!

Talking of sweet footage, here's a couple of Edits I have made since my last post. Enjoy!

Home Trails


Monday's Ride

Wednesday, 7 March 2012

Bike Update - Giant Reign

,
Hi,

After replacing the rear shock due to a scoring mark appearing on the stanchion I am now able to ride the beast again! But this isn't without its problems. I have come to realise that the almost broken stock LX rapid rise rear derailleur is now 7 years old (and so are the jockey wheels). therefore I have bought a new XT one from www.flatoutcycles.co.uk. Can't recommend these guys enough for second hand bike parts. they sold it for half the RRP price and it looks in almost new condition! Delivery was respectable considering it was free. Ordered on Saturday, fitted to my bike by Wednesday. I'd had the website bookmarked for a long while but had not needed anything for a while. I knew the time would come though.

I decided to go for a TF Tuned Rock Shox Monarch RT3 shock as I'd heard good news from them and they lots of flexibility when it comes to adjustments. I had mine tuned to the highest compression damping as the Reign frame has a ratio of 3:1 on the Rock Shox tune chart. I often bottom my shock out on some of the bigger drops out there so I wanted something quite progressive in feel to catch me at the bottom of the stroke. Anyway the Monarch has been fitted for about a month and it's taking it's time to bead in but it's getting better and better.

As I had some spare Amazon vouchers I bought an RRP Neoguard for the fork. I was not expecting much but it really does make a difference when your blasting through a muddy section. I think I've bought it at the wrong time though; at the end of winter. In these conditions where I live the dirt is like clay and this first of all, provides no grip for the tyres meaning you have to dab a foot, this then gets between your foot and pedal. meaning you have no grip between your shoes and pedals. To cure this I've bought some longer pedal pins (read shin diggers). These are 2mm longer than the existing 8mm socket head bolts fitted to my HT Nano Thru-Pin pedals. So far they are working very well. The only problem is they have torn through the tread on my one year old Shimano AM40 shoes. I'll need a new pair of those then......

Anyway, Here's some pics and a video me and a friend made.


Sunday, 4 December 2011

Bike Update - Scott Aspect

,
Hi Guys!

I've been riding the Scott lately on some XC routes round where I live. I've also upgraded the brakes and changed the rear wheel due to the freehub on the old one giving up on me. The brakes I went for were Shimano BR - M596. I went for these because of the low price they were selling at from RoseBikes and also because even though the BR - M485's I had on previously were causing problems, they only started this towards the end of their life and they had lasted over 3 years which I think is ok for a budget brake making me think another set of shimano brakes will fit the bill.

Seen as I had got the brakes from a German Dealer, the levers needed swapping over to the British way round. I knew this when I bought them. Even if they didn't need swapping, chances are the hoses would need shortening. I found an online guide and set to work.

The procedure was not to hard to follow really, all the parts except the hose cutter were included so I didn't really encounter any problems. The brakes are now on the bike and working fine. The only problem is that the back brake is not quite properly bled so when the bike has not been used for a while the lever will pull further than I would like but this is cured by a few pumps and it will be fine for the rest of the ride.

Overall, I'm pretty pleased with them. They do the job just fine and for the money I can't complain.

Here's some pictures:


Here's a little arty one I eddited in Photoshop. You can tell I had time to kill :)